
Steaming Milk & Latte Art
Pouring Latte Art
Begin your pour quickly after steaming to avoid separation of milk and micro foam. If the micro foam and milk separate, your art will be lumpy and clumsy with a final pull through that will smear the art rather than polish it.
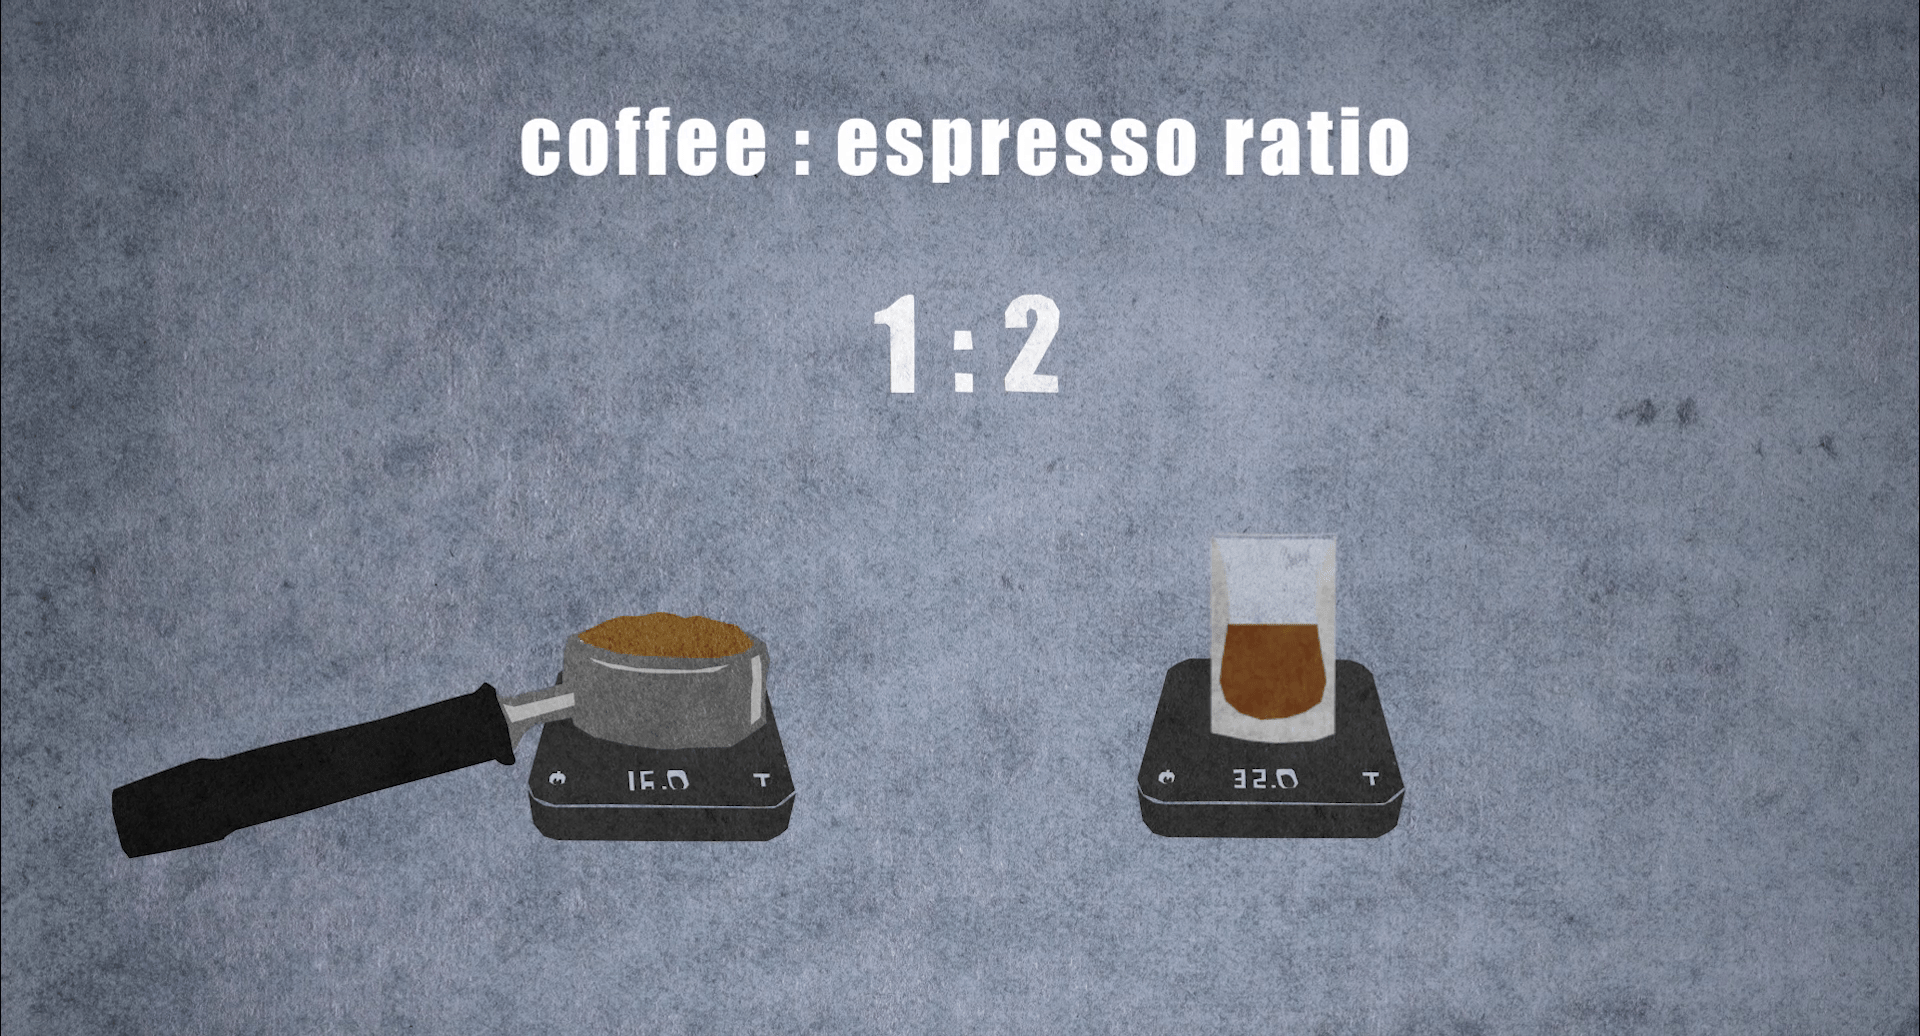
- Integrating the milk with the espresso
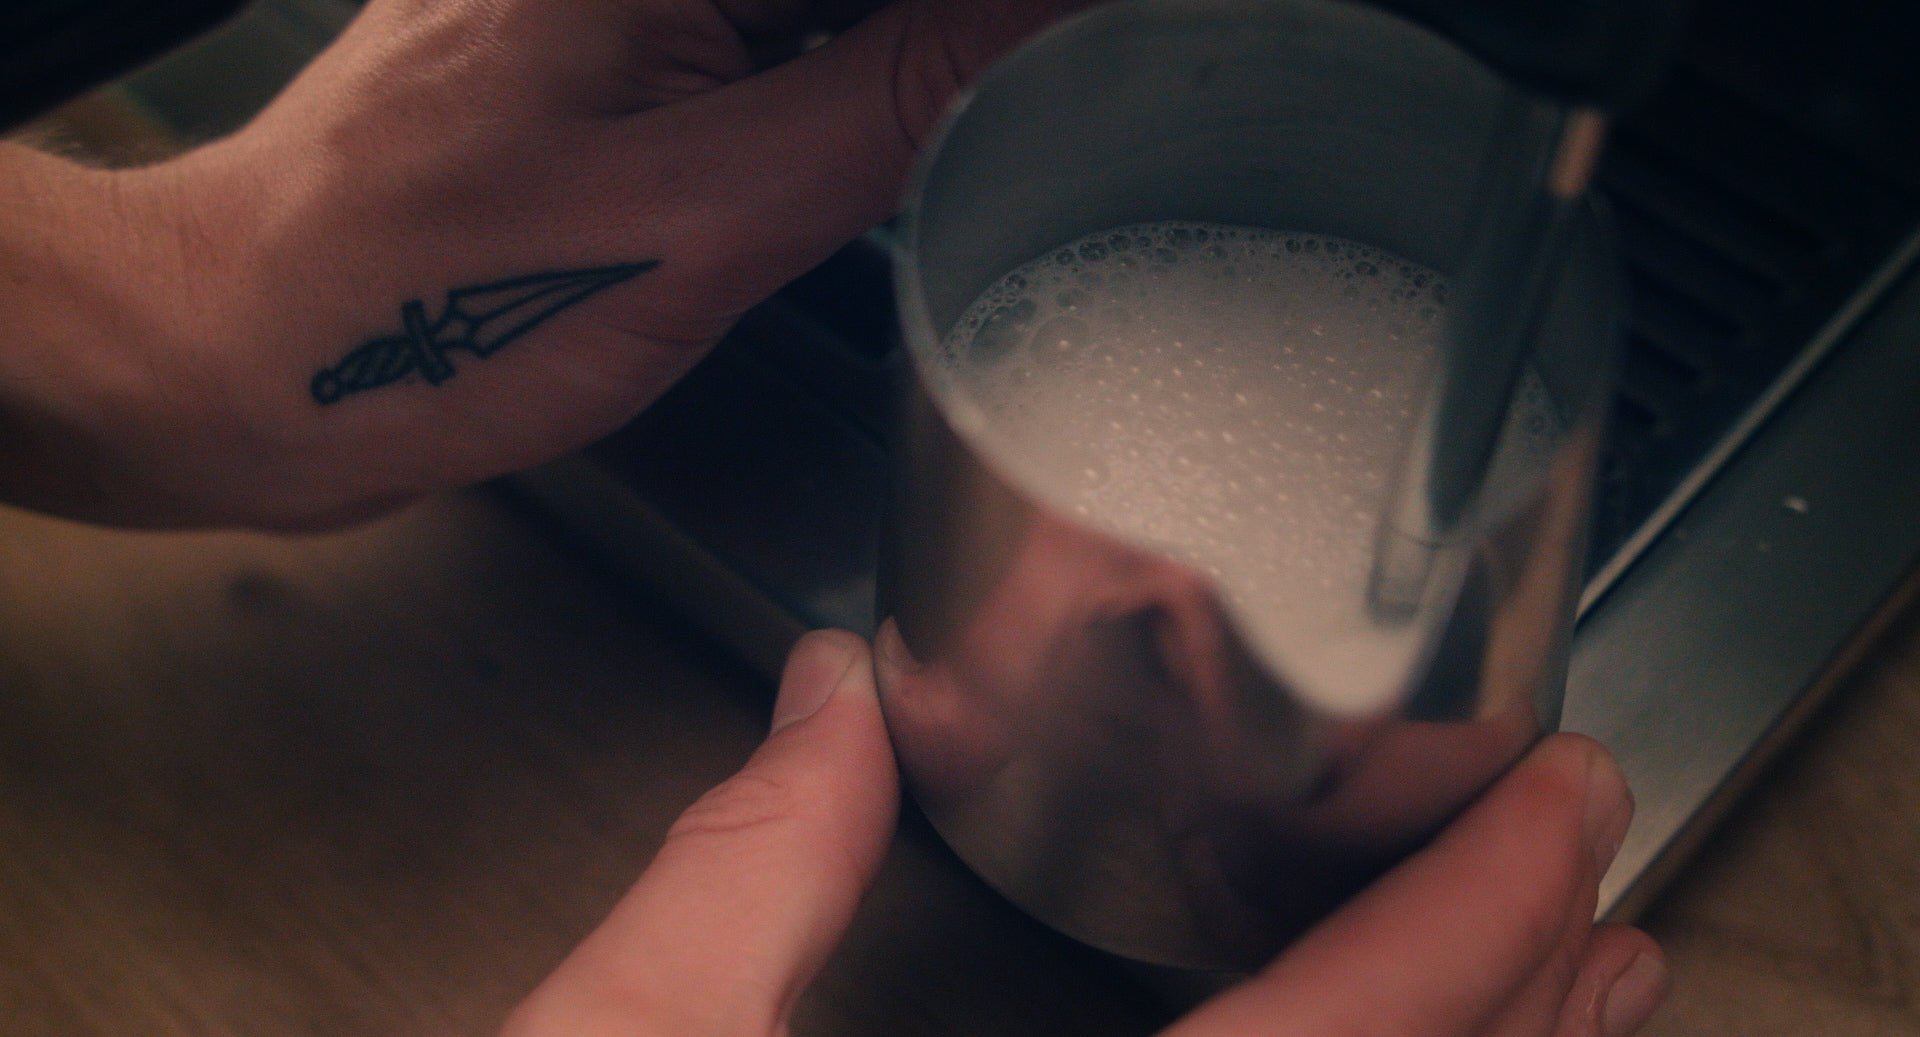
- Gently pour the milk beneath the surface of your espresso’s crema for the initial integration. Tilting your cup to a significant angle will provide a wider surface area while allowing you to minimize the height of your pour. It is important to incorporate the milk and espresso without splashing or creating unnecessary bubbles that will vandalize your art later in the pour.
- Begin your art by pouring a slow and steady stream into the deepest part of the cup, maintaining a minimum height between your spout and the surface until you see the silky micro foam start taking to the surface like paint on a canvas. Don’t forget to level out your cup as it fills. You can pour more quickly as your cup’s depth increases.
- keeping the spout close to the surface will allow the micro foam to rest on top, giving you the opportunity to to manipulate the flow into a work of art. Think of the pour as if you are laying the foam on top of the cup, not pouring too harsh, or deep beneath the surface. Pouring too harsh will decrease contrast, and warp your art into add shapes.
- To pour a rosetta, rock the pitcher from side to side in the center of the pitcher as the base wraps around the rim of the cup, then work backwards slightly until the full length of a rosetta is formed. To finish, raise the pitcher upwards and pull a thin stream of milk down the center of your cup to neatly fold the leaves of the rosetta in half.
Tips:
What is micro foam?
- When steaming the milk for premium micro foam, think “division of air bubbles”
- At the beginning of your steam, while your wand is on the surface making that hissing gurgling sound, it is pushing air into the milk. The air you push into your milk when the wand is on the surface will be quite large and somewhat bubbly at first, but, as you dive your wand beneath the surface, creating a vortex, your goal is to stop introducing more air into your milk. Instead, try sucking those bubbles beneath the surface of the milk in order to continually divide them throughout the steaming process.
- If your pitcher is screaming at you, this means you have not introduced enough air to your milk. Bring the wand back up to the surface for a bit, and give it some more air, before diving back down.
- The vortex in your pitcher allows for a consistent division of air as the bubbles make their way around the pitcher. As the air bubbles contact the wand’s pressure, it divides them into smaller and smaller bubbles, becoming a silky sweet micro foam.
common mistakes:
- If when you pour, your art is absent, wispy, thin, and runny, then your milk is under aerated. Add more aeration by keeping your steam wand on surface a little bit longer in the beginning of your steaming process before submersing your wand. This will give you more air in your milk.
- If when you pour, your art is too fluffy, filling the surface of your latte, then your milk is likely over aerated. The steam wand was likely on the surface too long, pushing too much air into your milk, causing it to float and fill the surface. Too much aeration is one of the leading causes of baristas struggling with their latte art. Over expanded milk is difficult to work with, can cause a lack of contrast, and can even taste scorched and imbalanced when unevenly steamed.
- If the foam is stiff and sticks together, flopping out of your pitcher in a clump, it has likely separated between the time you steamed your milk and when you started the pour. Be a bit quicker on the draw, or work your milk in order to reincorporate it before pouring.
Read more
Bachmann Accu Drive Numeric System
Learn how to dial in your tool with Bachmann Accu Drive markings.
Read more